Add a Ticket
To create a ticket, follow the below steps:
1. Click on More in the main menu. In dropdown menu, click on Help Desk under Support Column.
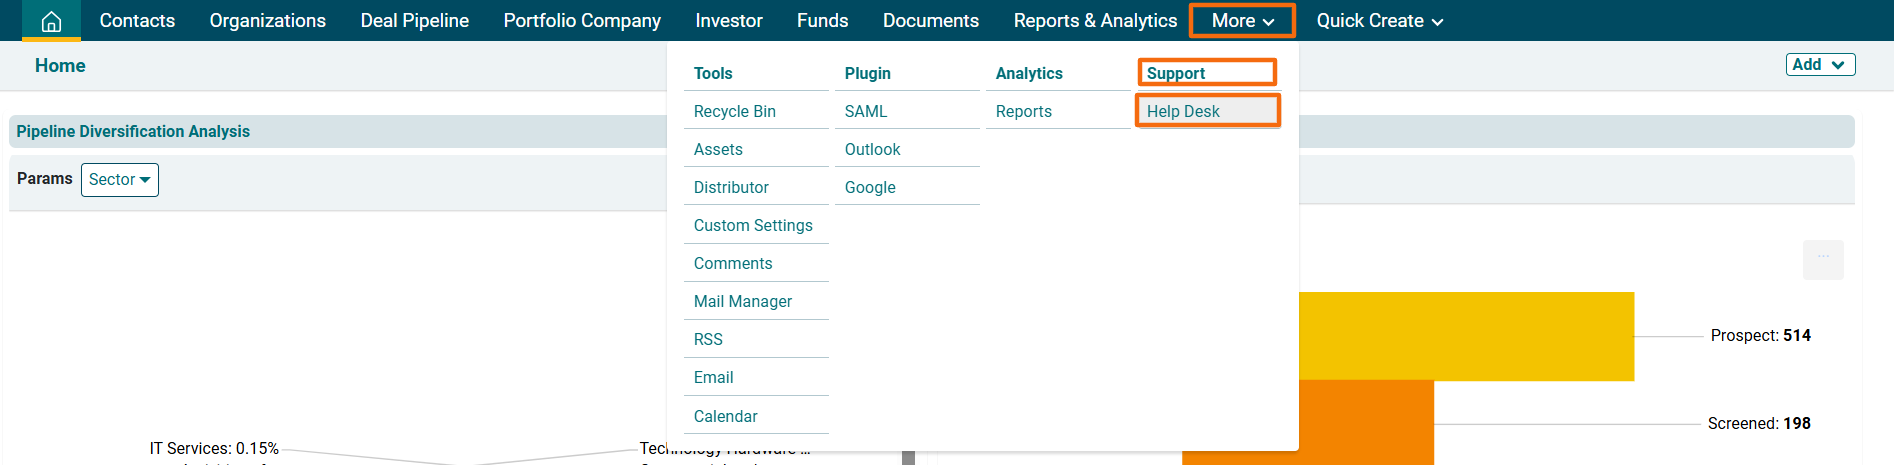
2.Click on the Add Ticket button (![]() ) in the top right corner.
) in the top right corner.
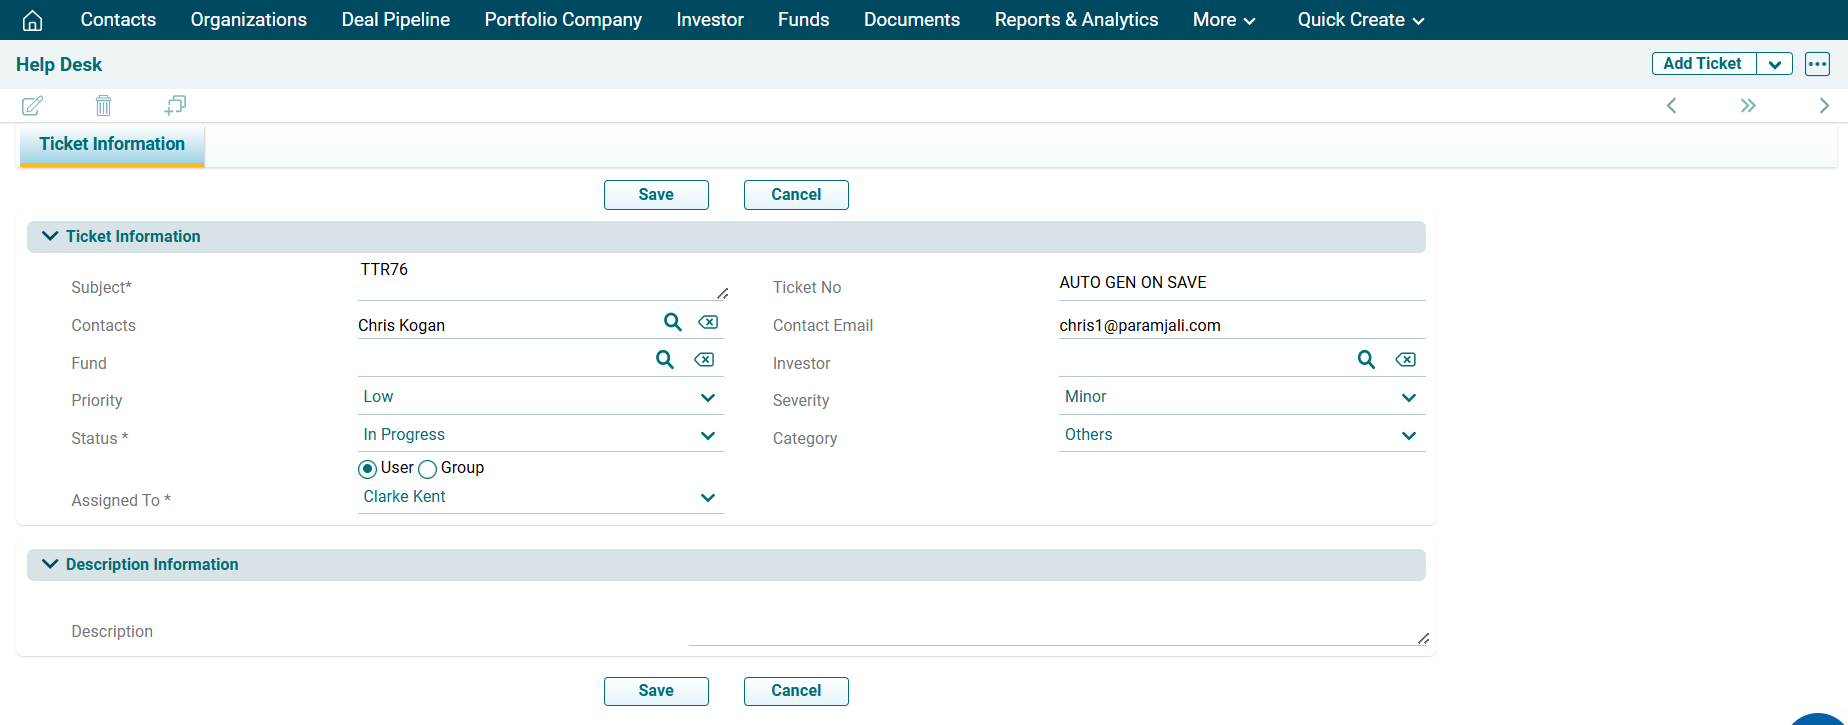
3. The Ticket Information window is displayed. The details included are:
- Subject: Specify the ticket subject.
- Ticket Number: This is an auto-generated field.
- Contacts: Specify the contact. Click on the search (
 ) icon. The Contacts window is displayed. Type the contact name in the search box. Use the filters in the top right corner. Click the contact name.
 - Contact Email: It is an auto-populated field based on the contact selected.
- Fund: Specify the fund. Click on the search (
 ) icon. The Funds window is displayed. Type the Fund name in the search box. Use the filters in the top right corner. Click the Fund name.
 - Investor: Specify the Investor. Click on the search (
 ) icon. The Investor window is displayed. Type the Investor name in the search box. Use the filters in the top right corner. Click the Investor name.
 - Priority: Specify the priority, i.e., High, Low, Urgent, or Normal.
- Severity: Specify the severity, i.e., Critical, Feature, Major, or Minor.
- Status: Specify the status of the ticket, i.e., Open, In Progress, or Closed.
- Category: Specify the category of the ticket.
- Assigned To: Specify the user or group to whom the task has been assigned.
- Description Information: Specify ticket description, if any.
Click Save.
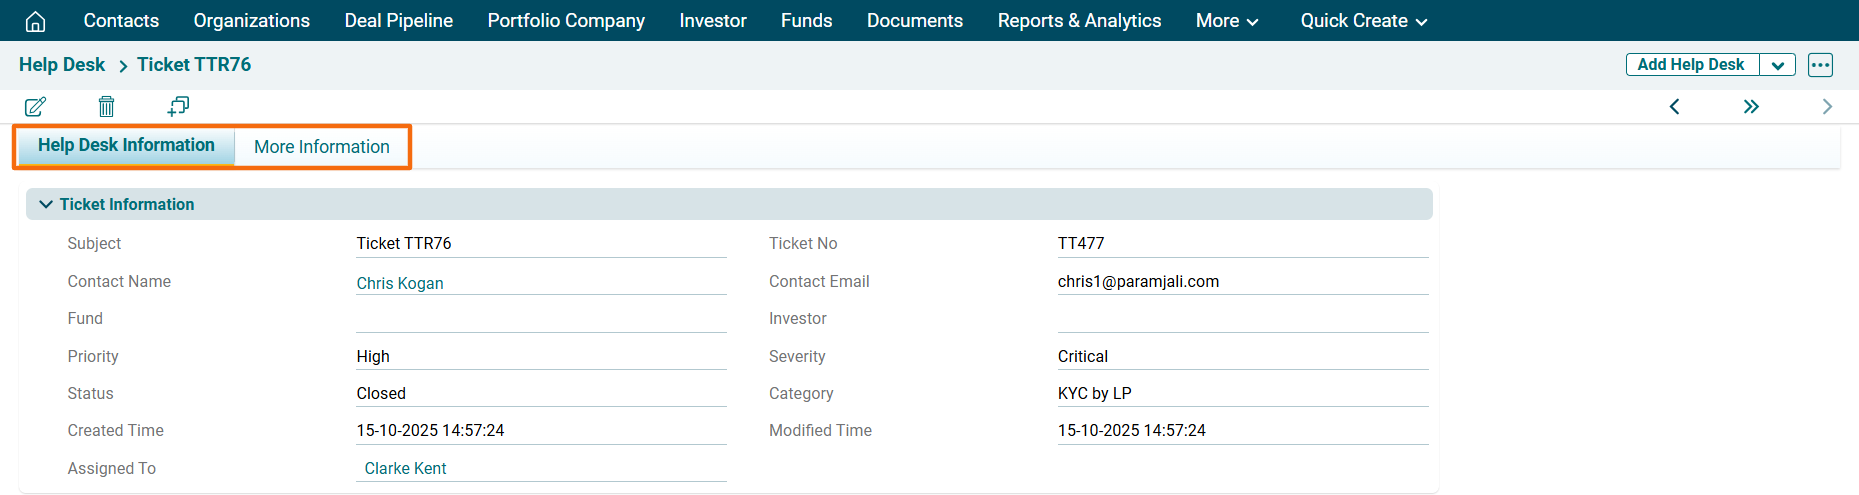
4. Once the ticket has been created, you will see two tabs here: Help Desk Information and More Information.
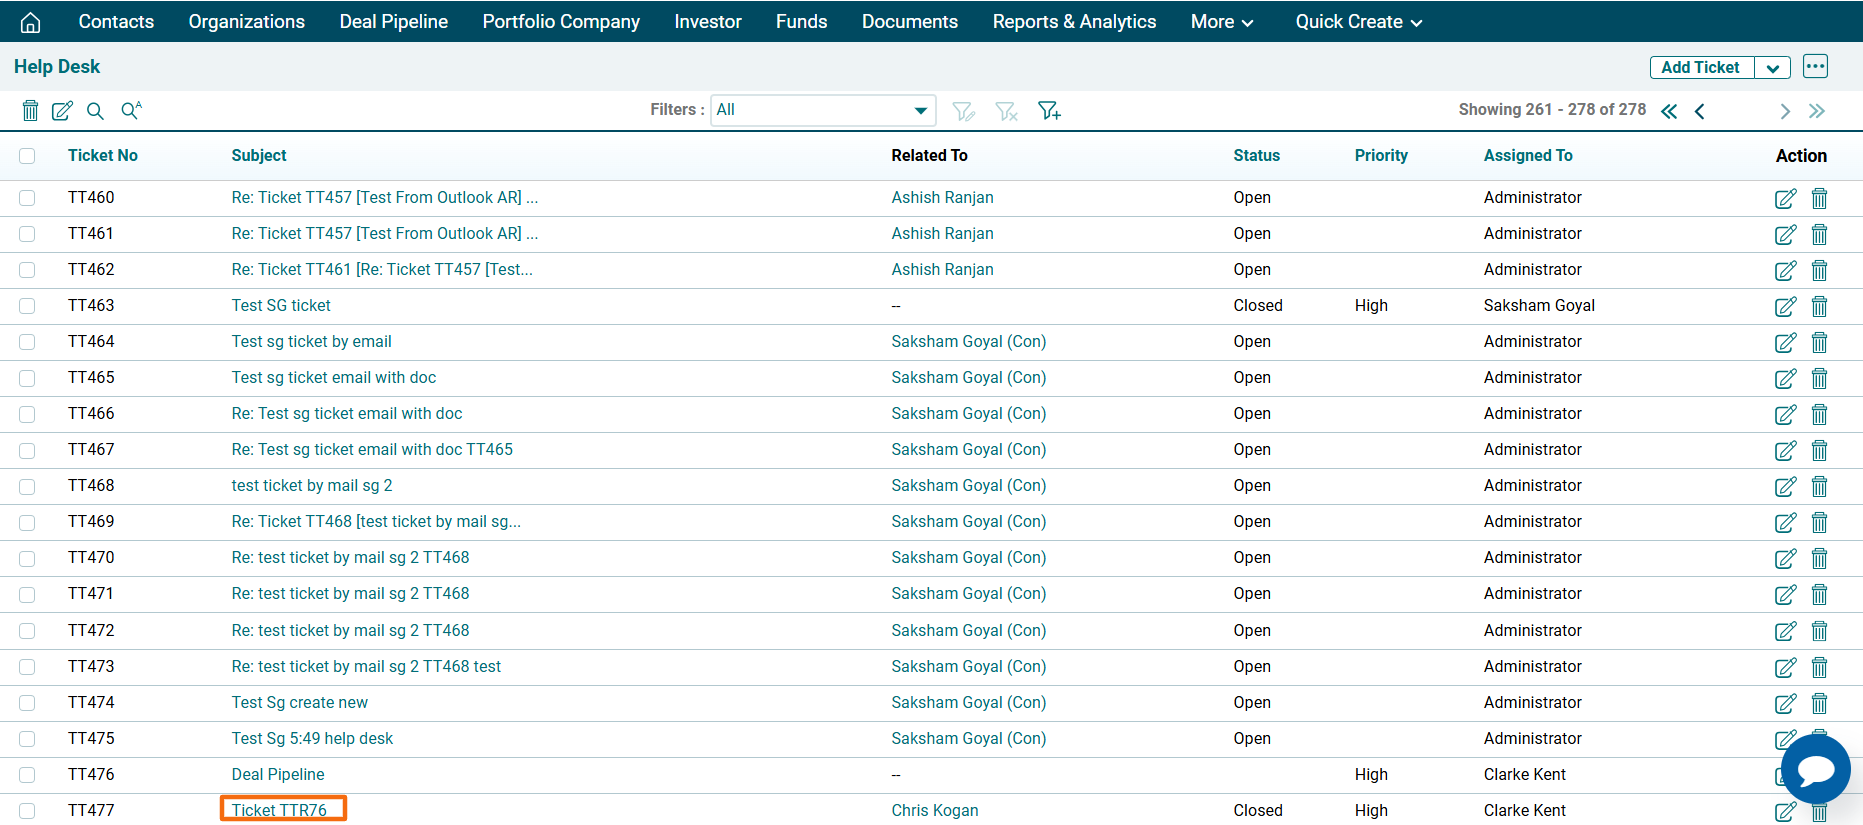
5. The created ticket can be accessed from the Help Desk page.