
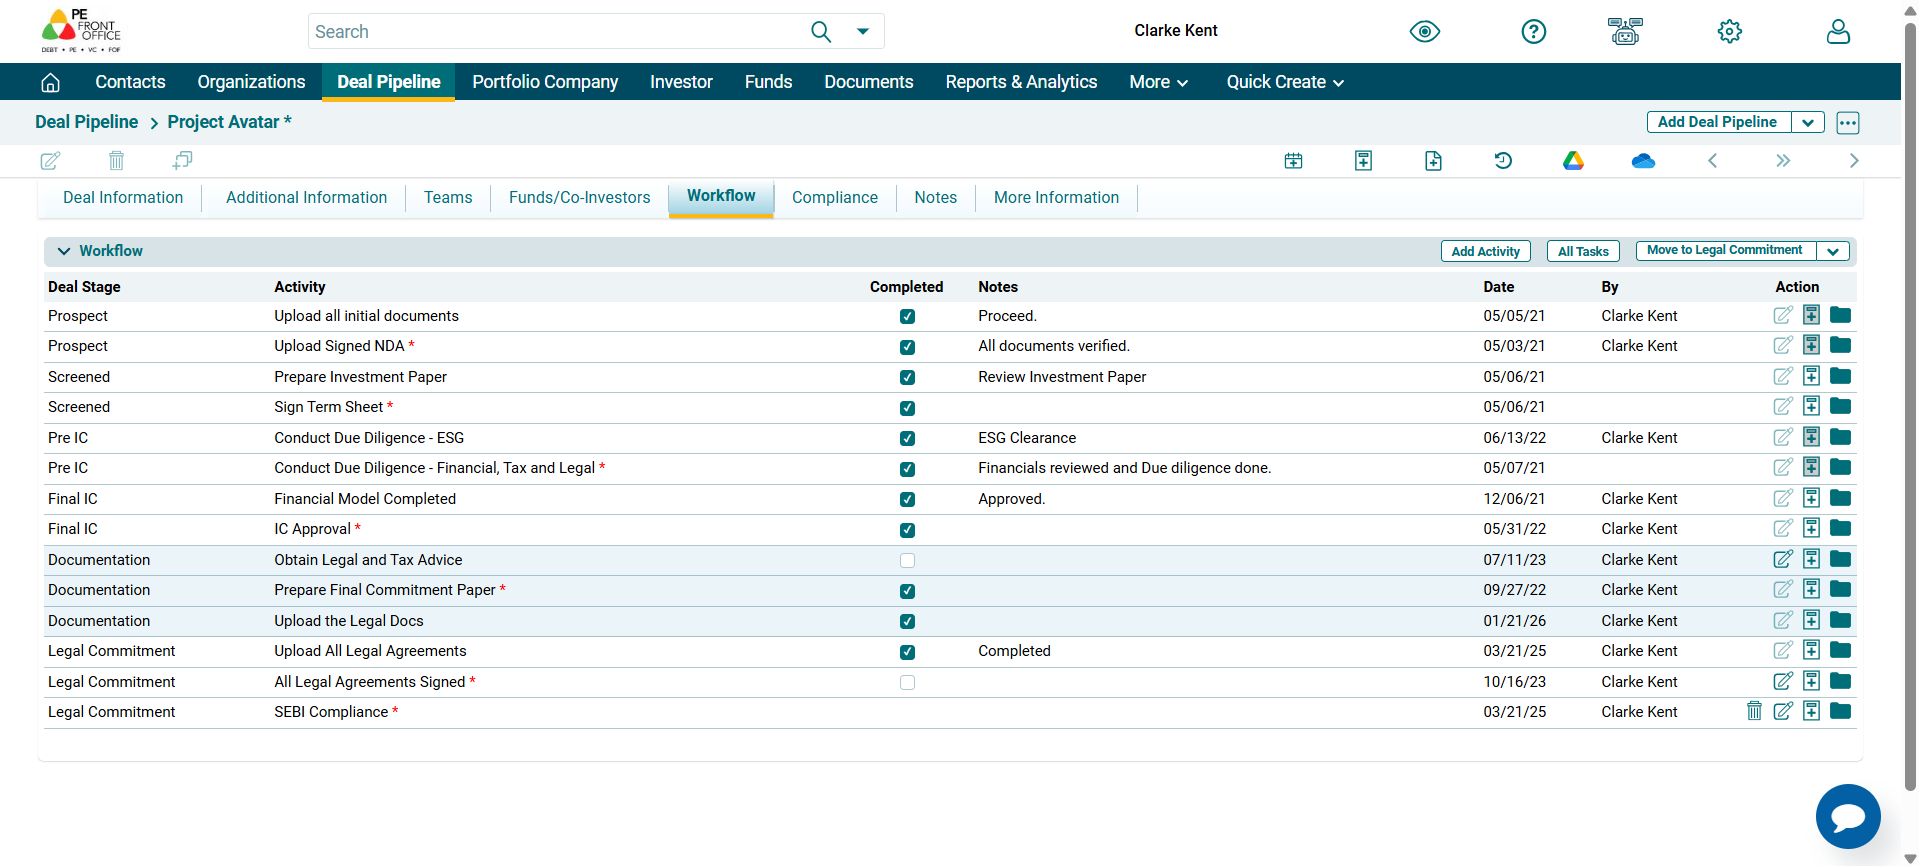
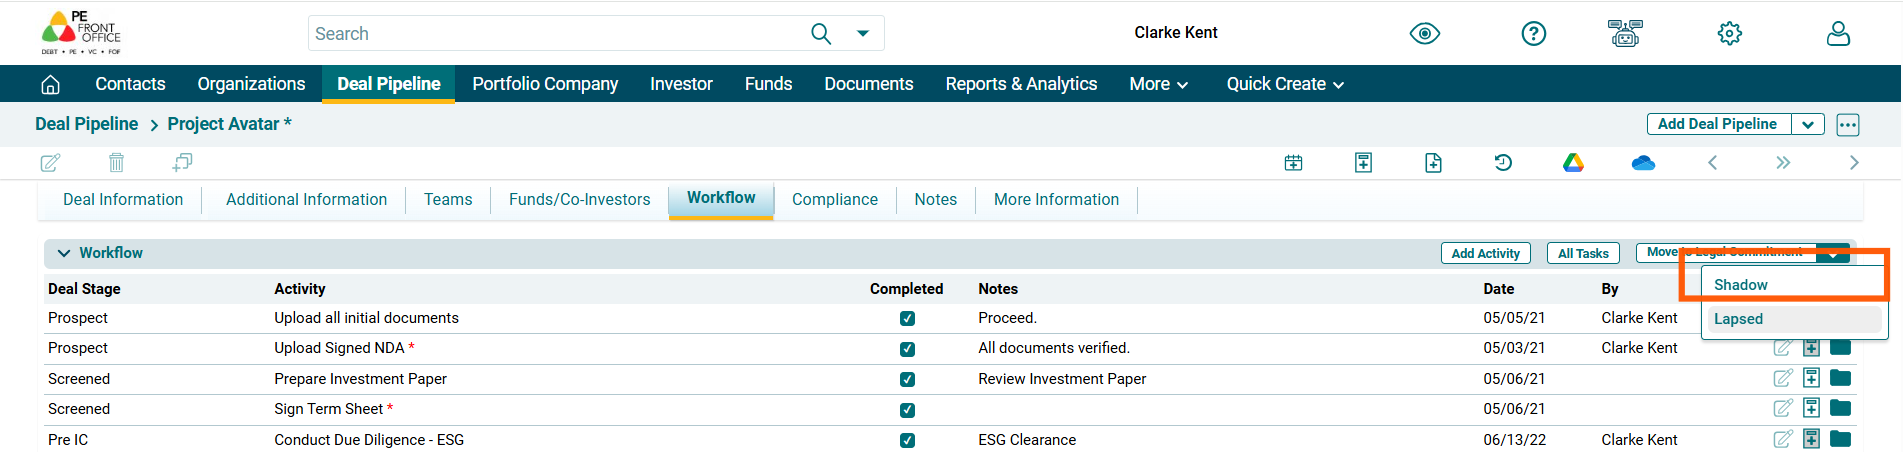
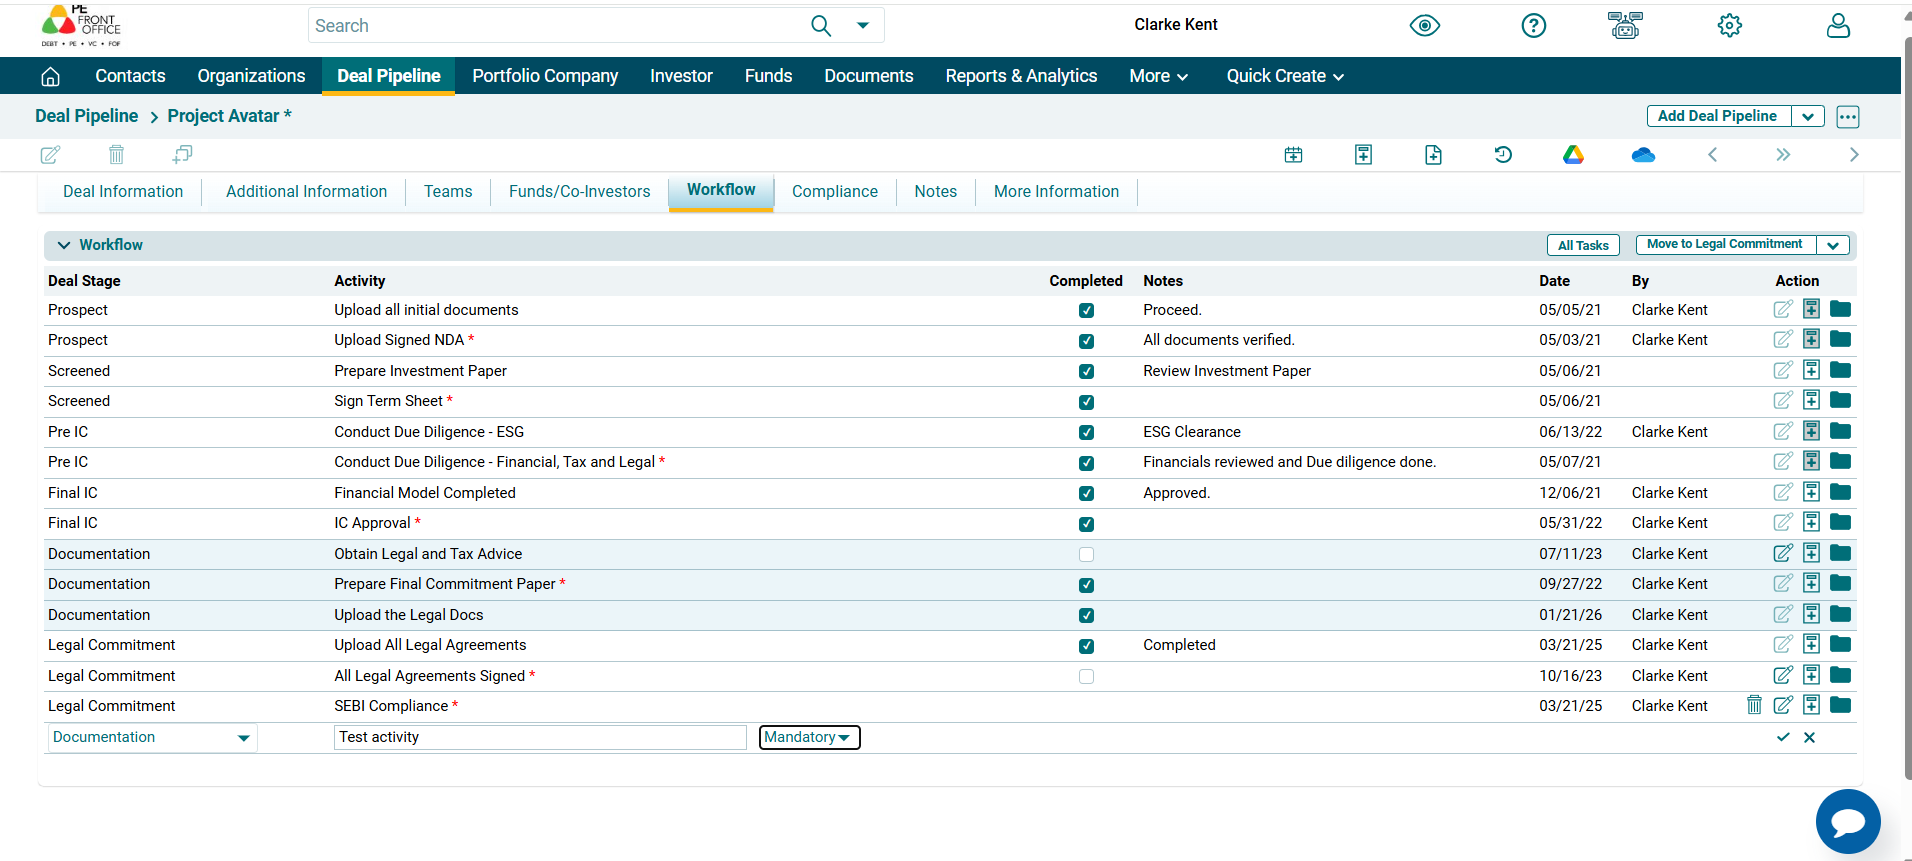
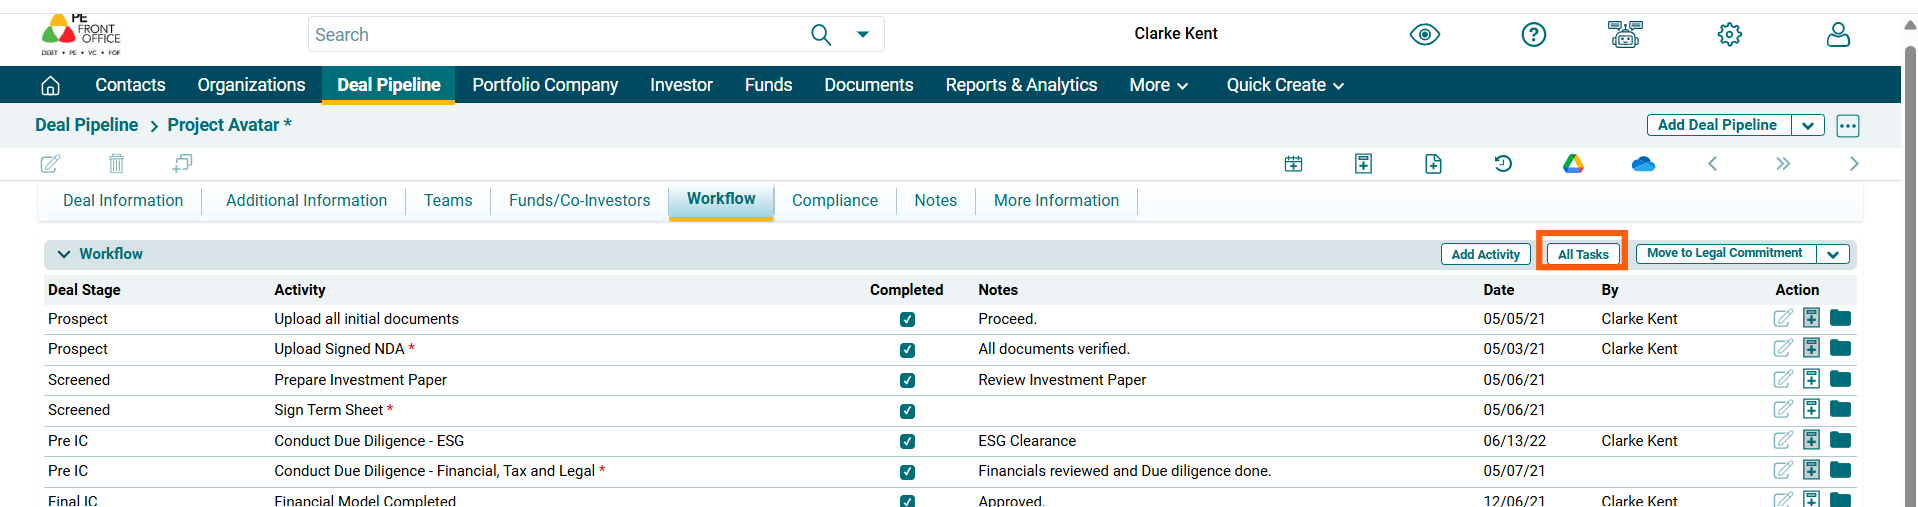
Workflow
In the Workflow panel,
you can track various due diligence activities mapped to different stages of
the deal. The details included are:
- Deal Stage: Includes stages from prospect to
commitment through which a deal passes.
- Activities: Includes corresponding activities
against each deal stage.
- Completed: Indicates if an activity is
completed. Mark the activity complete using Edit (
 ) button under the Action
column. Once an activity is marked completed, it cannot be edited.
) button under the Action
column. Once an activity is marked completed, it cannot be edited. - Notes: Capture notes against each activity. Click on Edit (
 ) button to enter
notes.
) button to enter
notes. - Date: Displays the date on which the activity was marked completed.
- By: Displays the user's name that made the changes.
Edit/Delete an Activity
1. To edit a
task, click on the Edit icon ( ) in the Actions column.
Update the details and click on Check (
) in the Actions column.
Update the details and click on Check ( ) button to save. Once an activity
has been marked completed, it cannot be edited.
) button to save. Once an activity
has been marked completed, it cannot be edited.
2. To delete a
task, click on the Delete icon ( ) in the Actions column. The
delete window is displayed. Click OK to delete the activity details.
) in the Actions column. The
delete window is displayed. Click OK to delete the activity details.
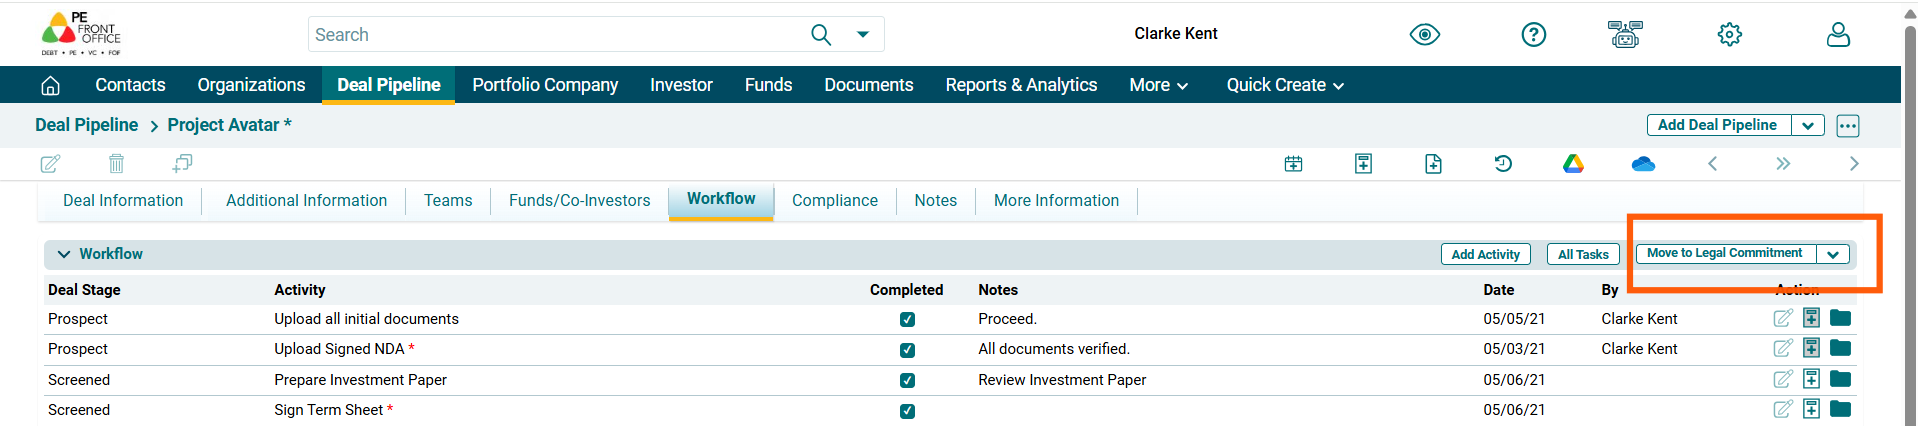
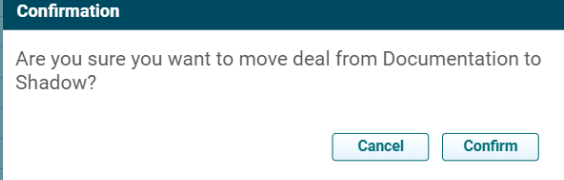
Move a Deal
To move a deal to the next stage, follow the below steps:
1. Based on the deal stage, it can be further moved to the next stage. To move the deal to the next stage, click on the button in the top right corner.
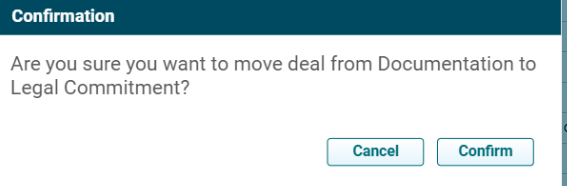
2. The Confirmation window is displayed. Click Confirm.
3. Click on the down arrow button to the right of Move Deal to [Deal Stage] button to move the deal to Shadow/Lapsed.
4. A confirmation window is displayed. Click Confirm button to move the deal.
Add Activity
To create an Activity, follow the below steps:
1. Click on Add Activity button in the top right corner.

2. Update the details, and click the Check( ) button from Actions column to save.
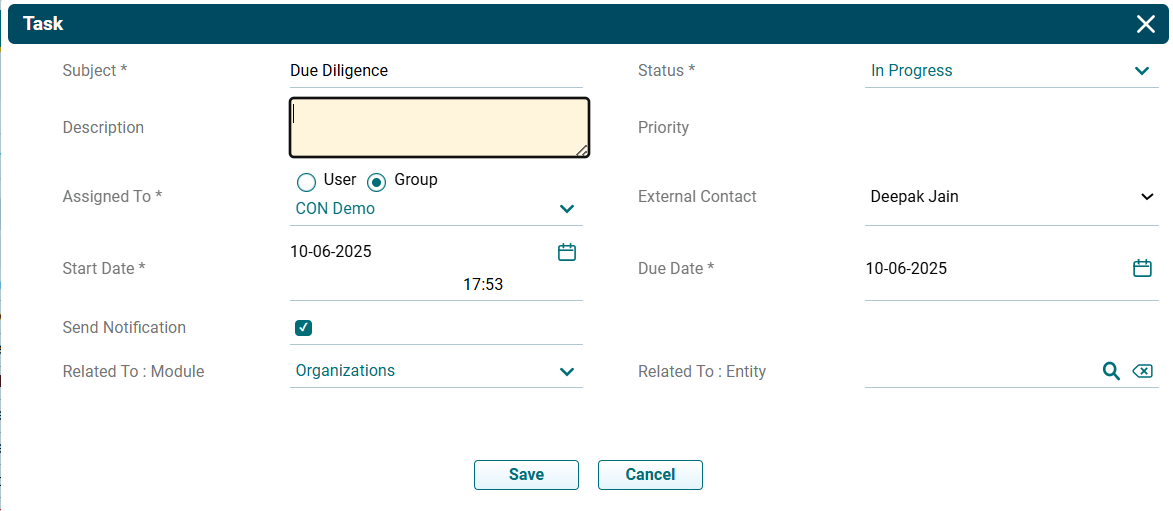
Add A Task
To add a task to a
certain activity, follow the below steps:
1. Click on Add
Task icon ( ) in the Action column.
2. The task window is
displayed. The details included are:
- Subject: Input the task name.
- Description: Input the task description.
- Assigned To: Task gets assigned to the user
automatically
- Start Date: Enter the Start Date.
- Send Notifications: Check the box if you wish to send a
notification to the team.
- Related To: Search the module with which the task has
to be associated.
- Status: Select the status of the task if it
has started, is in progress, completed, planned, etc.
- Priority: Select the priority of the task if it is a
high-priority, low-priority or medium-priority task
- External Contact: Search the contact from the Contacts
Module with whom the task has to be associated.
- Due Date: Enter the due date.
- Related To: Search the entity with whom the task has to be associated.
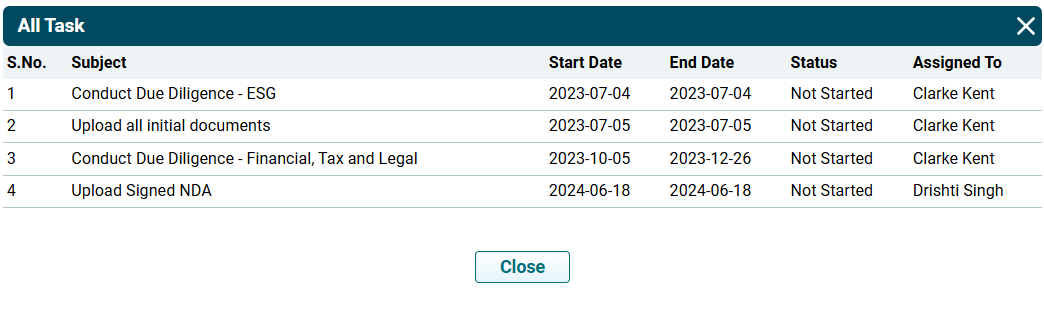
View Task
To view a task to a certain activity, follow the below steps:
1. Click on All Tasks button in the top right corner to view all the tasks.
2. The All tasks window will be displayed listing all the Tasks.
Access Documents
Click on Folder icon
( ) in Action column to access the
uploaded documents. The Documents panel under More Information tab is
displayed. Add, Select, or Access documents from this panel.
) in Action column to access the
uploaded documents. The Documents panel under More Information tab is
displayed. Add, Select, or Access documents from this panel.
